I missed the update last Thursday. Well, not so much “missed” as “decided not to do”; I was beat. I’ve had this week
off, so I’ve done more physical work than usual. But, to make up for it, a double-post!
Would I have done a post on Thursday, it would have been about the fact that I put up the roof on Cora’s playhouse! The
first step was to put up the framing for it.
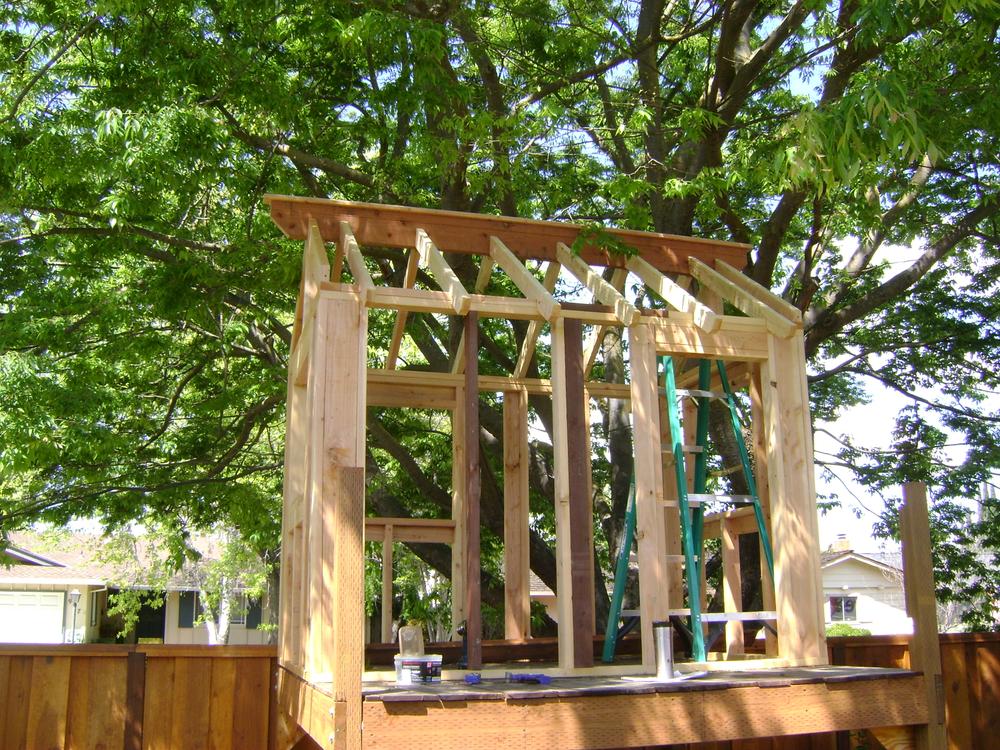
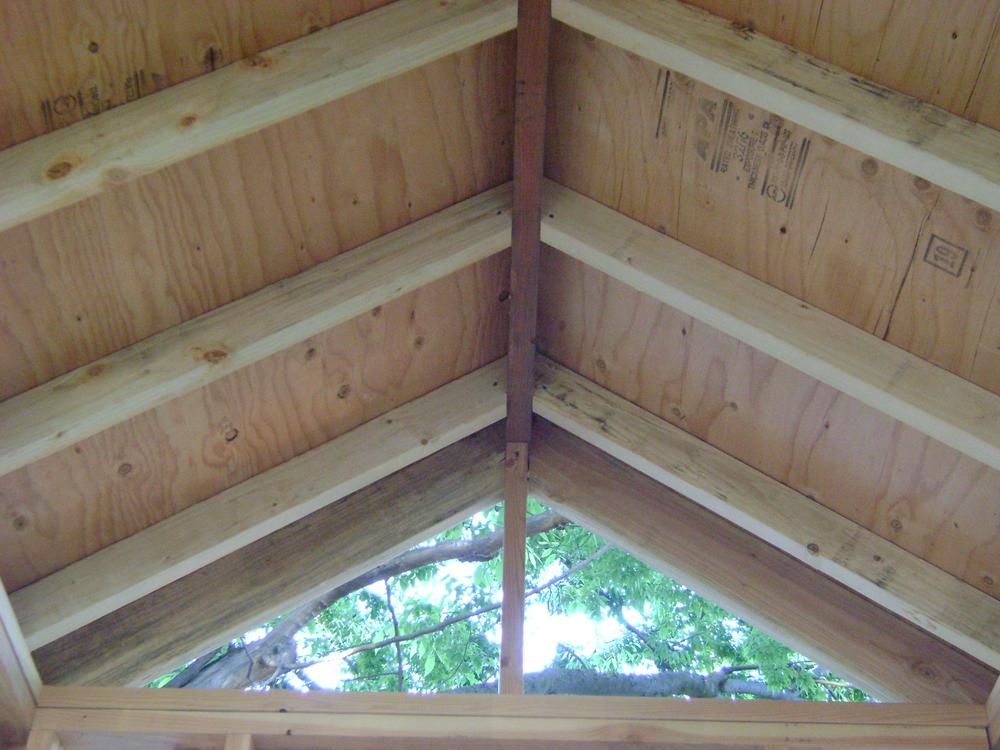
This was fairly simple to do; I had already done most of the cutting as documented in update 4. First, I put
up the ridge posts in the middle of the side walls. I already had some blocks on the sides so I could just slide the
ridge beam down between them. Well, that proved to be the first problem; the ridge posts were finished 2x4s (1-1/2”),
and the ridge beam was unfinished (1-3/4”). So, I had to loosen the blocks enough to get the (very heavy, 10’ long
redwood 2x8) able to slide into place. Then I screwed the beam to the posts. After that, I decided that centering the
beam would be a good idea (measure twice, then cut twice, then measure again, then cuss, right?).
After I got that in place, I clamped one of the rafters to the block and traced out where the rafter would intercept the
top sill, then cut bird’s mouths in all the rafters I was going to use. The jigsaw… is not ideal for this. I need a
bandsaw. It’s on the list.
Then, it was just a matter of measuring where the rafters would go, followed by actually tacking them in place. This
proceeded pretty rapidly, as there wasn’t much to slow me down. However, I found that I put the ridge posts about a half
inch off center, so one set of joists lines up perfectly with the bottom of the ridge beam, but the other set, while they
line up with each other, are about 1/2” below the ridge beam. We didn’t want this to be perfect, did we?
Now the fun part: sheathing.
That’s the 1/2” ply I put on top of the rafters. Oh, did I mention this is ~12’ off the ground and full sheets of plywood
are heavy? Geez, if I never work with full sheets of plywood again, it’ll be too soon!
Anyway, I cut them down to size so I could end on rafters and screwed them down. Also, did I mention that being ~12’ off
the ground, working with heavy, practically full sheets of plywood, and trying to stand on them while they’re at a 30
degree angle just sucks? If I hadn’t, I have now. I’m NOT looking forward to shingling!
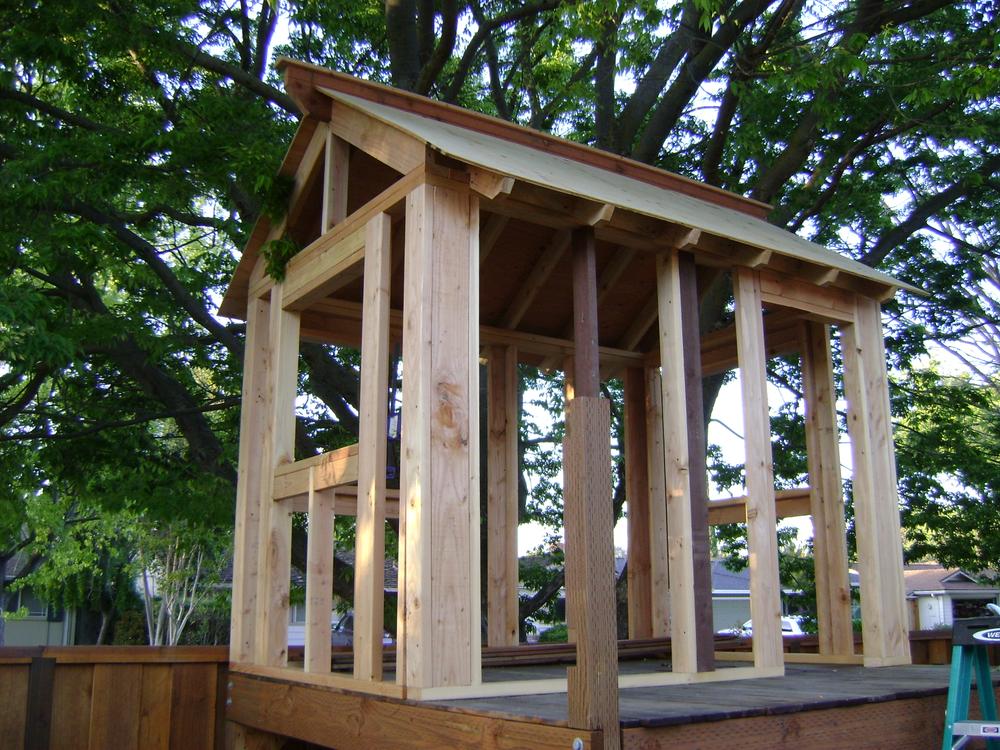
The final touch was putting the blocking between the rafters in place. That was much more hassle than I care to admit!
The premise is simple: screw at an angle on this side, screw straight in from the outside of the rafter on the other.
The thing which isn’t mentioned is that, often, the angled screws will intercept other screws already in place from either
attaching the rafters or from the other blocking. Just super frustrating. But, the end result looks pretty clean!
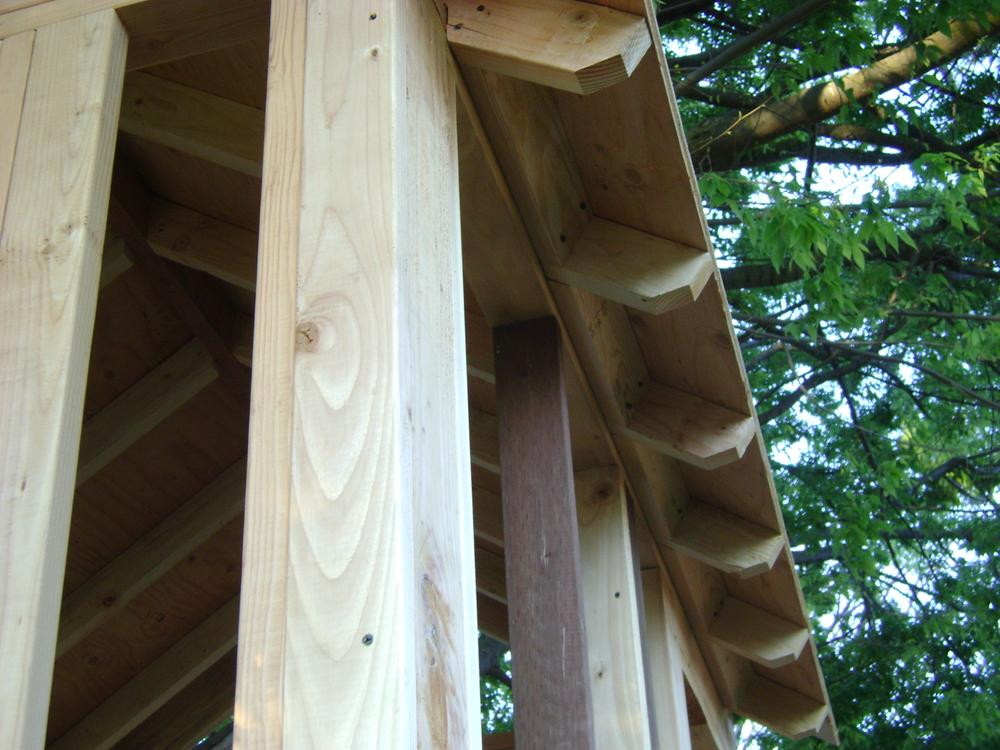
And here, you might be able to see that the rafters on the left are lower, and that the ridge beam is wider than the
ridge post. Oh well. it’s super stable!
Well, that’s it about the roof. This is where I would have stopped on Thursday, so it’s time for an

Friday was all about the siding. I determined that, for safety reasons and for “looking done” reasons, I wanted to get
the siding up this week. And, I did. I just about killed myself and several sheets of siding in the process (refer to my
earlier statements about “off the ground” and “sheets of plywood”), but I don’t have to do it again. GREAT!!!!
This took a lot more planning. I had to cut things fairly precisely so they would look good relative to each other. Now,
I am planning on adding trim on the corners, around the windows and doors, and adding one more rafter on the outside of
the sides, so I didn’t have to get the cuts TOO perfect (thank god; I would have failed miserably!), but I still tried
because why not?
Well, here’s the end result:
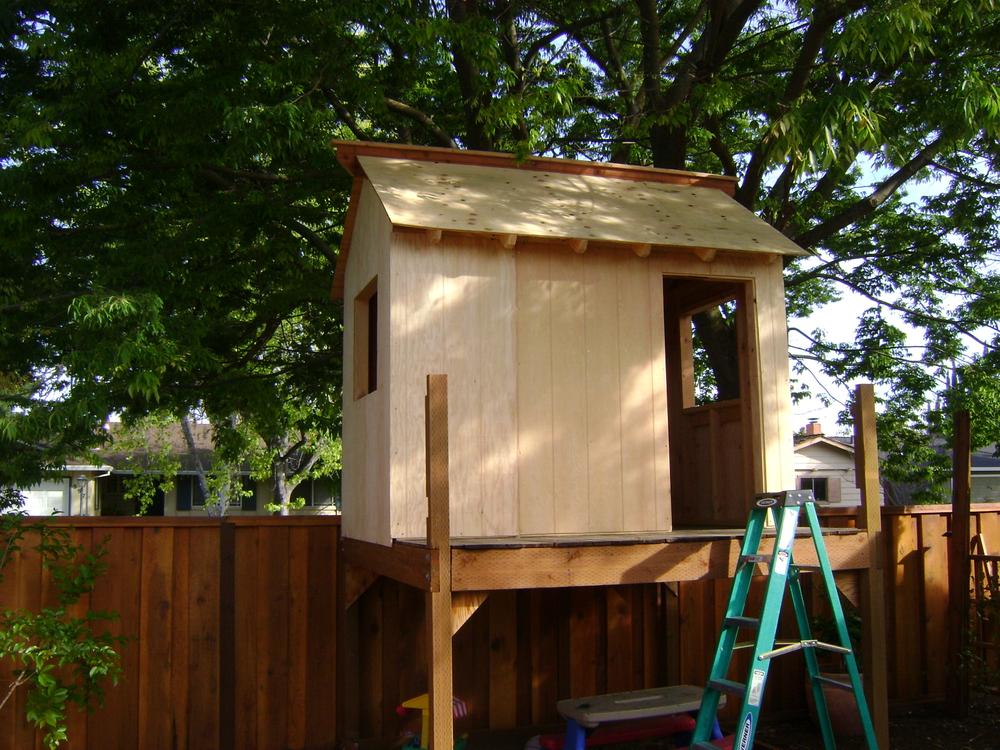
As you may have noticed, there are a couple… difficulties with the design of this playhouse. First, it’s 5’-6” off the
ground. Therefore, any reaching I have to do is going to be basically on a ladder. This is… not fun. Second, it’s up
against the fence in back (there’s like 3” clearance), and our yard level is ~12” higher than the sidewalk on the other
side of the fence. So… there’s added challenge there; I can stand on a ladder and really stretch, or I can stand on a
fence.
Spoiler: I didn’t fall, and I didn’t drop any siding on accident. I DID fling my ladder in a fit of rage; I almost
flung my drill, but had enough wherewithall to gently-yet-aggressively put it down on the grass so I didn’t break it, my
only drill (well, I have another but it wouldn’t be good for this). Note: I need a much smaller and lighter bit driver
drill for doing things like installing hundreds of screws.
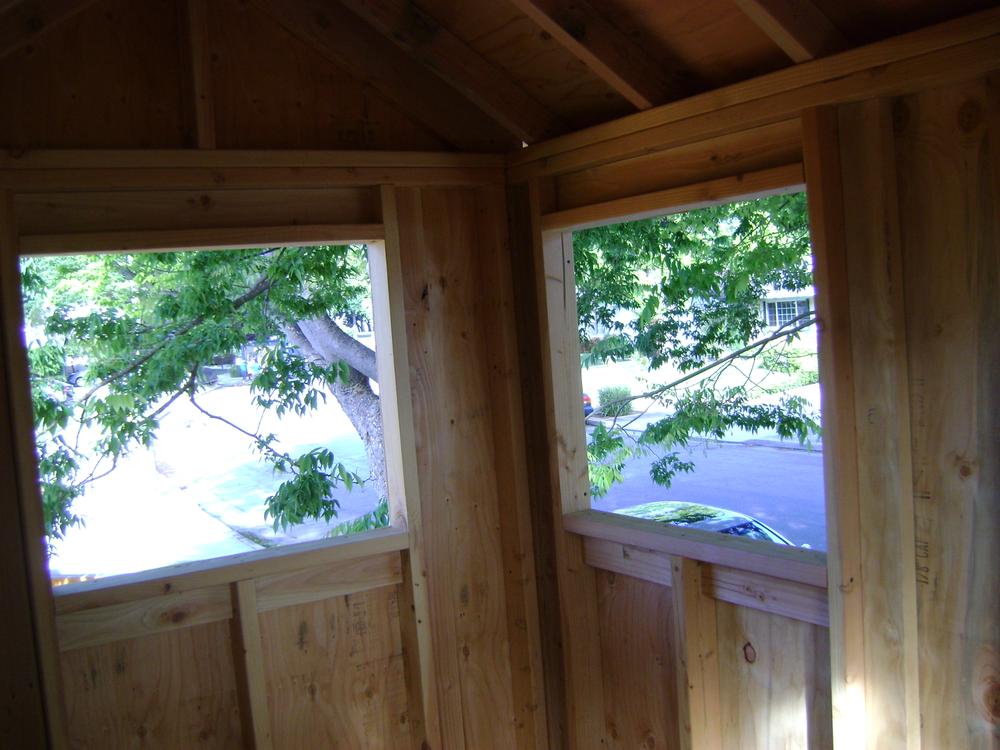
Well, the cutting went… well-ish. It’s awkward cutting window-sized holes from sheets of plywood even when you have plenty of
workspace, and that wasn’t the case for me. I only mismeasured and mismarked once, but I caught myself as I was lining
the cut up, not after I’d cut, so I didn’t ruin any panels. The material is 3/8” siding with 8” on-center relief, like
you’d find on sheds. It wasn’t as heavy as the roof sheathing, but it was more awkward.
I took my time as much as possible, calculating, manipulating, moving, etc. But there is a certain impetus to get done
quickly when moving sheets of plywood several feet off the ground! Eventually, all the sheets ended up in place, aligned,
with about 99% of the inaccuracies in places where I’m going to be covering them up with trim. There are a few places
where I drove a screw and missed a stud (either because I just missed or because there never was a stud there to begin
with), so I’ll have to make sure those holes are stopped up. Actually, who am I kidding? There aren’t going to be
“windows” per se, just frames. And the door isn’t exactly going to be weather-proofed. And it’s quite likely that I’m
gonna put 1/4” ply up on the inside walls for drawing surfaces and the like, so why bother with those few holes?
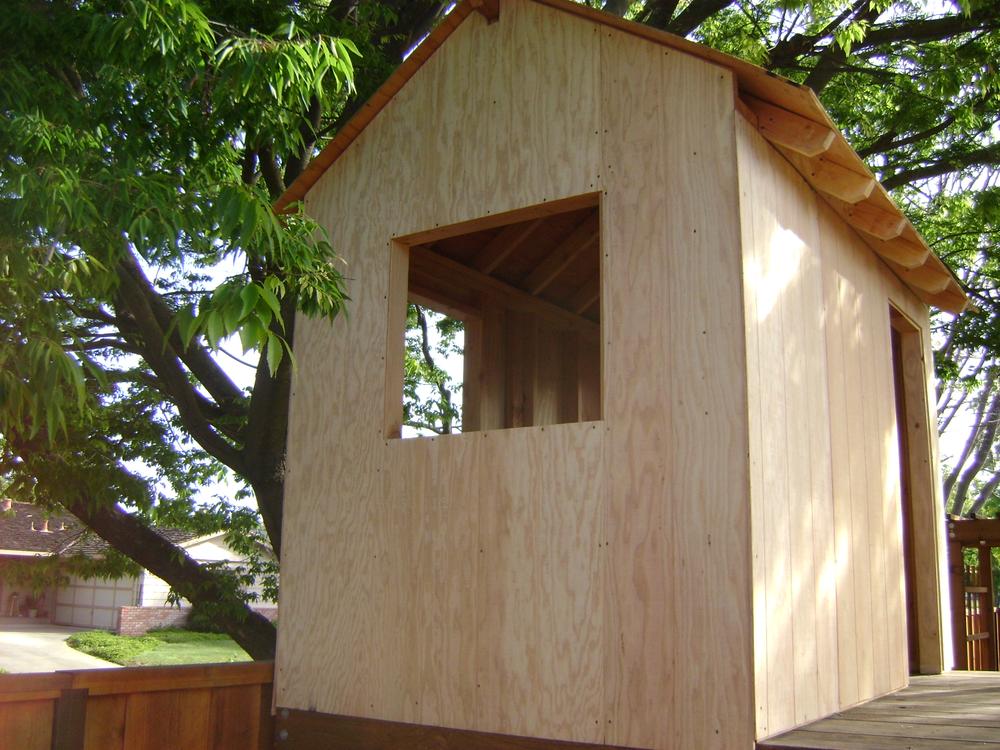
All in all, I think it’s looking great and I’m proud of it. Even if it is kicking my butt!