In preparation for other ideas, I decided to try out a few things to make a timelapse of me building one of my recent
LEGO purchases, set 10246, the Detective’s Office. And here it is! Video first, details later, right?
I’ve been wanting to get another modular building to go with my Grand Emporium set, but just hadn’t
gotten together enough desire and money to get it. So, I saved up and got the Detective’s Office. I really wanted to get
the Palace Theater, but they didn’t have it in stock; I’ve only seen it online. Since I lucked out and made
a very large purchase on a day they had double VIP bonus points, I already have $55 for my next purchase, so it might
come sooner than later.
Anyway, back to the Detective’s Office. It has some fantastic attention to detail; I’ll be posting some pictures on my
Facebook page. But it was also quite a bit of fun to build. There’s just something about buildings that I
like doing; I have a few sets that I do each winter that are a blast too.
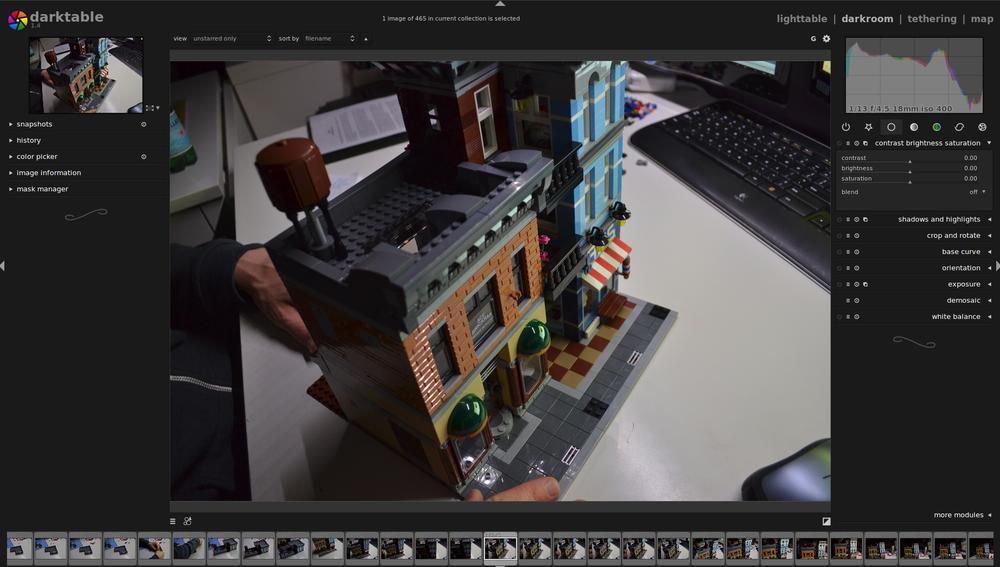
So, in order to do the timelapse, I got a clamp for my camera to hold it in place. I’m using my Nikon D3100 for this as
I can control it from a program and get the pictures sent to my computer. The program I’m using is Darktable
for Ubuntu, and the camera interfacing is powered by gphoto2. So far, I’ve been very impressed with the
software, even if the UI is a little unclear at times.
I settled on doing one picture every 15 seconds (4 frames per minute, if you’re not math inclined). I did this at reduced
jpeg quality (no RAW) with fixed focus, shutter, and aperture. I wanted to do autofocus so I could, say, hold a piece or
assembly up closer to the camera, but the software crashes when I have autofocus on (which is… weird). The zooming
effect was just bumping up the zoom a smidge every frame. All told, I took ~420 frames, which means it took me ~105
minutes to do the assembly.
To assemble the images into a video, I first resized everything to a max 1080p frame size:
:::bash
cd /where/i/stored/the/images
mkdir resized
mogrify -path resized -resize 1920x1080 *.JPG
This took about 5 minutes to process all the files. I could have jumped this up by installing and using parallel,
but I didn’t care that much; I knew I wouldn’t take too long. After this completed, I tried to use ffmpeg (which is a
very good set of software for encoding/decoding/transcoding virtually any video format to virtually any other), but found
I didn’t have it installed, so I took the 20 minutes (!) to install it. I then ran
:::bash
ffmpeg -pattern_type glob -i '*.JPG' -c:v mjpeg -q:v 2 -r 25 output.avi
to pull the images into one video file. Basically, this says take all the files which end in “.JPG” (-pattern-type glob
-i '*.JPG'), create a video using the “mjpeg” codec (-c:v mjpeg) with quality level 2 (-q:v 2) at 25
frames per second (-r 25), and dump the video into a file called “output.avi”. Now, quality level 2 is the best
quality and, as a result, the largest file size; level 31 is the worst quality and smallest.The video above is 16 seconds
long and has no audio, but is still 105MB large. I’m going to do tests to see where the break even is in terms of quality
and probably just “make do” with 720p (which, by itself, should reduce the file size by 56% just from the smaller number
of pixels per frame).
Any rate, this was fun, and I’m looking forward to my next endeavor, which will be more polished!