For Christmas, I decided to make a nice cutting board for Shanin because, you know, who doesn’t like a
cutting board? After looking around for a while, I finally found a pattern which was close to what I wanted.

Found on Pinterest, of course
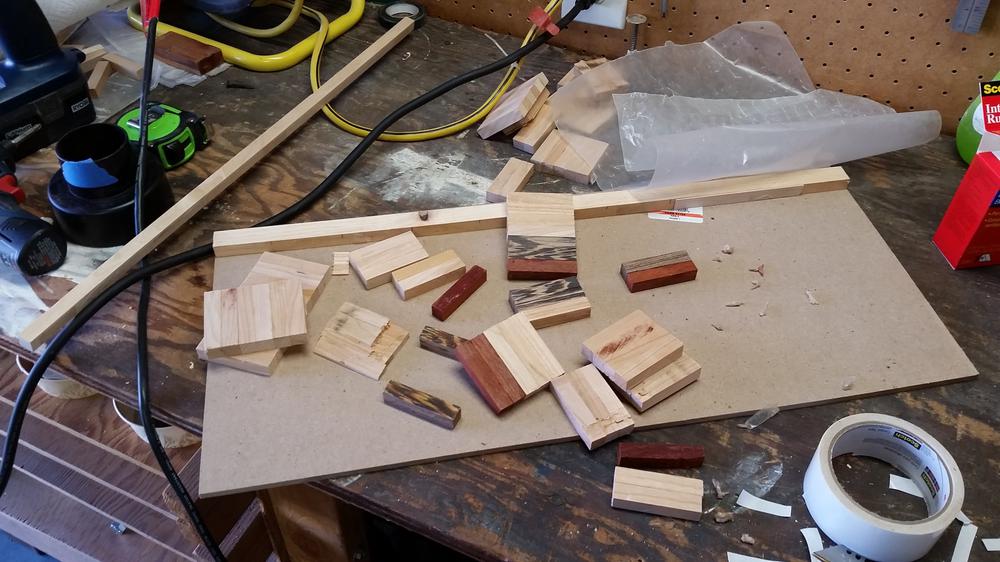
The first step was choosing wood. I needed three colors or species for the fox and a fourth for the background.
Of course, the orange of padauk was my first choice for the body of the fox, and I figured that maple would
work for the white fur bits and wenge or ebony for the black. Something neutral for the background would be
good, so I thought of cherry, walnut, or oak; checking prices, I decided on wenge over ebony and cherry for the
background.
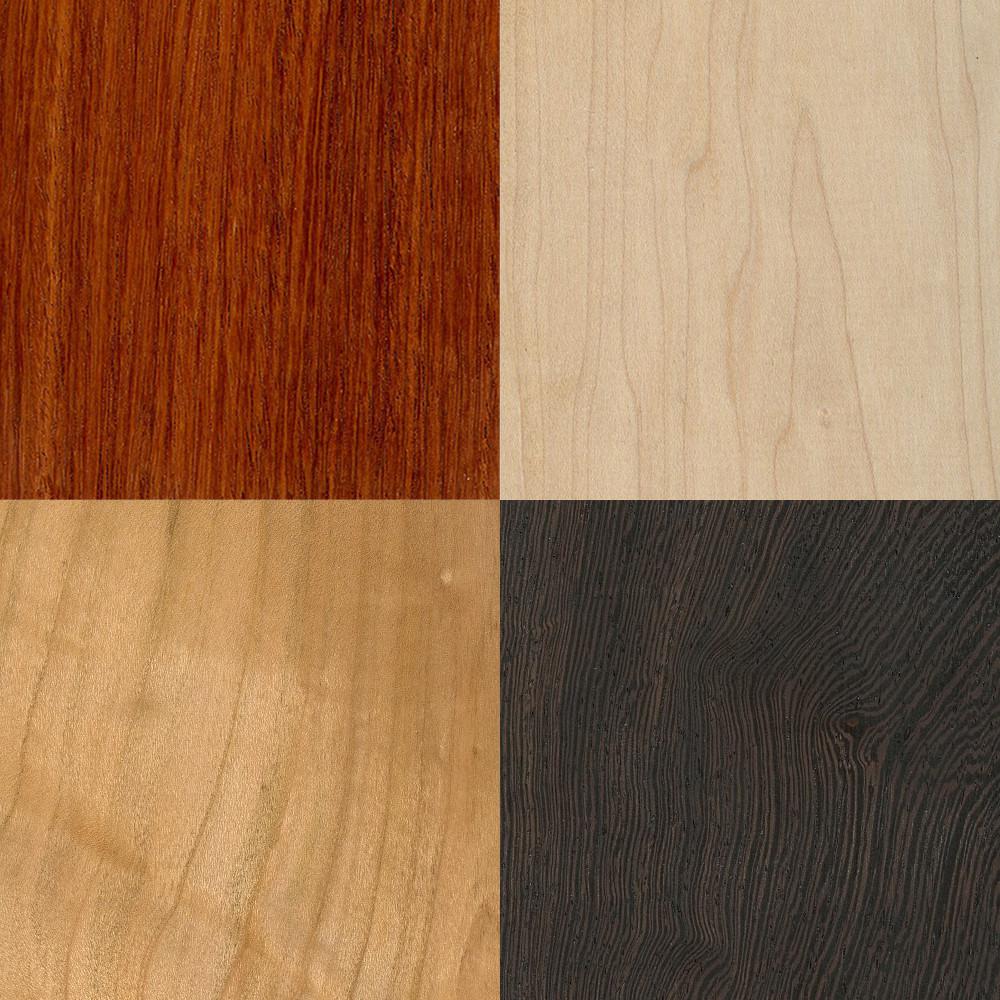
Counter-clockwise from top left: padauk, maple, wenge, cherry
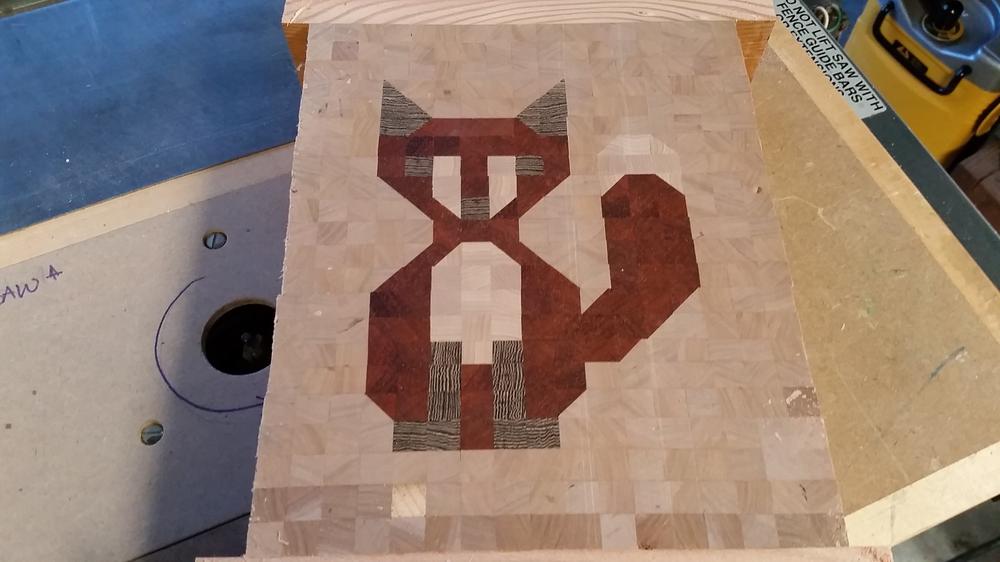
The cutting board would be made up of hundreds of small pieces of wood, each about 0.5” x 0.5” x 2.5”, arranged
so the endgrain would be the face of the board. This means cutting the raw wood lengthwise into strips half an
inch square.
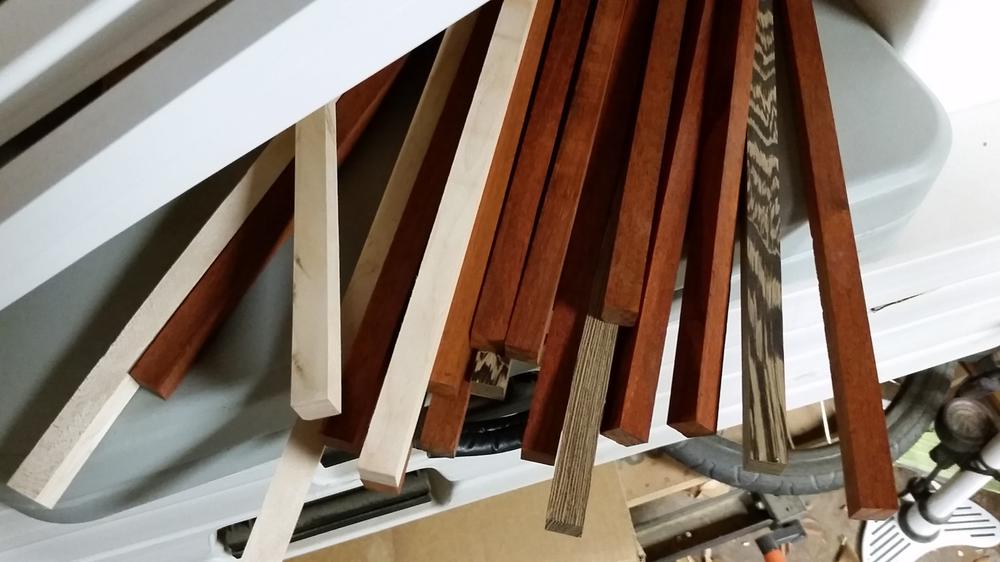
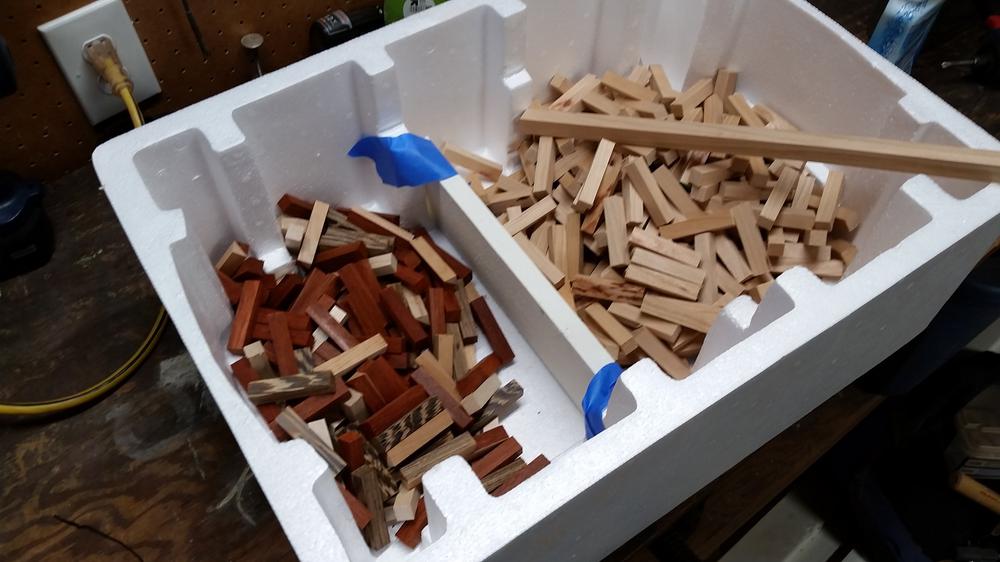
Once I cut the long strips, I cut them down into 2.5” pieces. It took a while, but I eventually had quite a few;
a 21 x 23 pattern means 483 pieces!
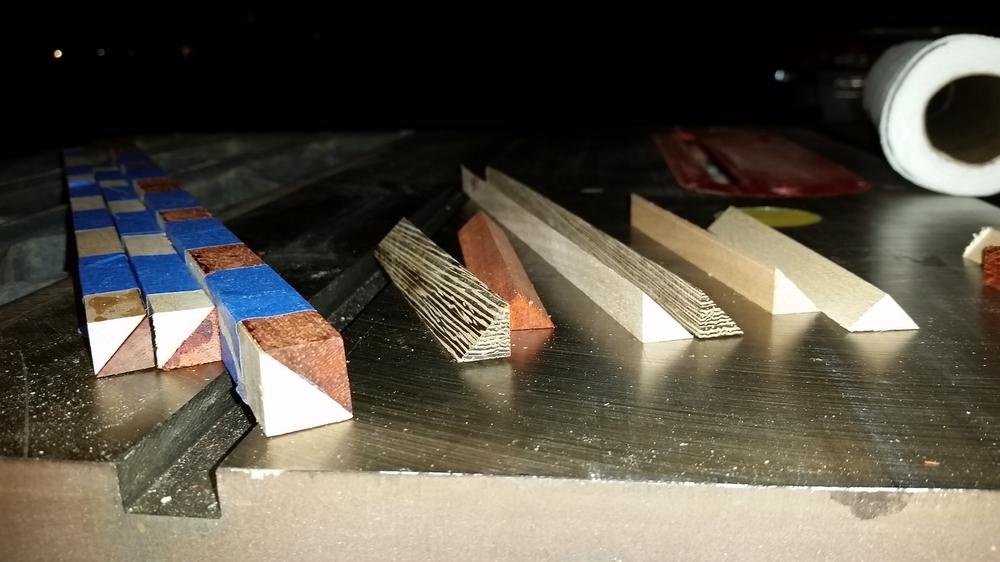
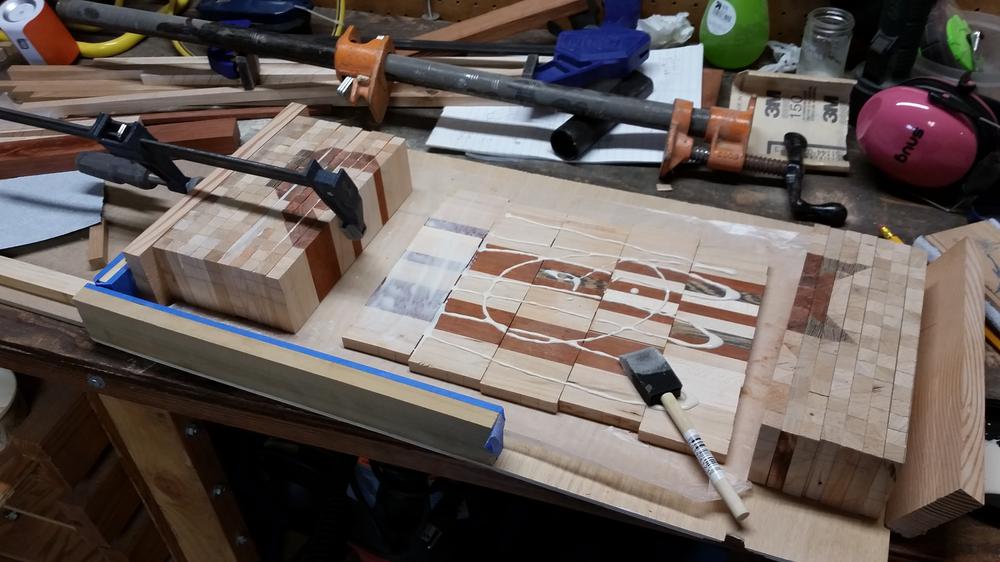
I also needed to make several 45° combinations for the edges. This took some doing with such small pieces,
but eventually was able to make the wood pairings I needed. After gluing, there was trimming down to the right
sizes.
Now, it’s time to assemble according to the pattern. This was fairly slow going, but I’m really happy that I had
a helper for this.
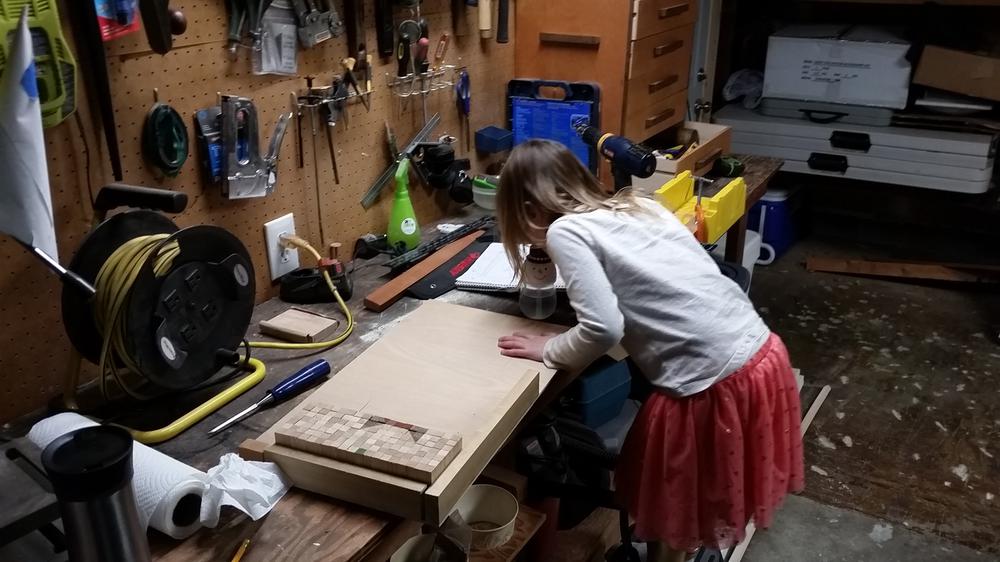
I’m even more happy because she’s free labor!
After getting the layout in order, I went row by row gluing together the columns of pieces. Eventually, I have
to glue them side-to-side into rows and then glue the rows together into a whole slab. So I’d glue the pieces
and clamp them all together.

Once I got all the rows all glued, I wanted to make sure that the faces of the rows are perfectly even so the
final glue-up went well. I decided to send them through the planer. What a mistake! The planer chewed the rows
up, sending chunks flying across the garage. I’m just glad that I wasn’t standing behind the planer, but rather
to the side. Luckily, the only losses were for the background pieces and I had plenty of spares!
After sanding the row faces smooth, I glued all the rows together nice and tightly. Then, when the glue dried,
I added some guides to the sides of the cutting board and sent it through the planer so it ended up nice and
smooth.
Some more sanding all around, corners rounding over, etc. and it was ready for a finish. Since it will be
used for food, I used food-grade mineral oil and then a mixture of mineral oil and beeswax. It made the
padauk darker than I liked, but it really highlighted the difference between the cherry and maple, so I think
it ended up looking super nice. It’s also VERY smooth and kinda feels soft, even though it’s also quite heavy
and solid feeling.
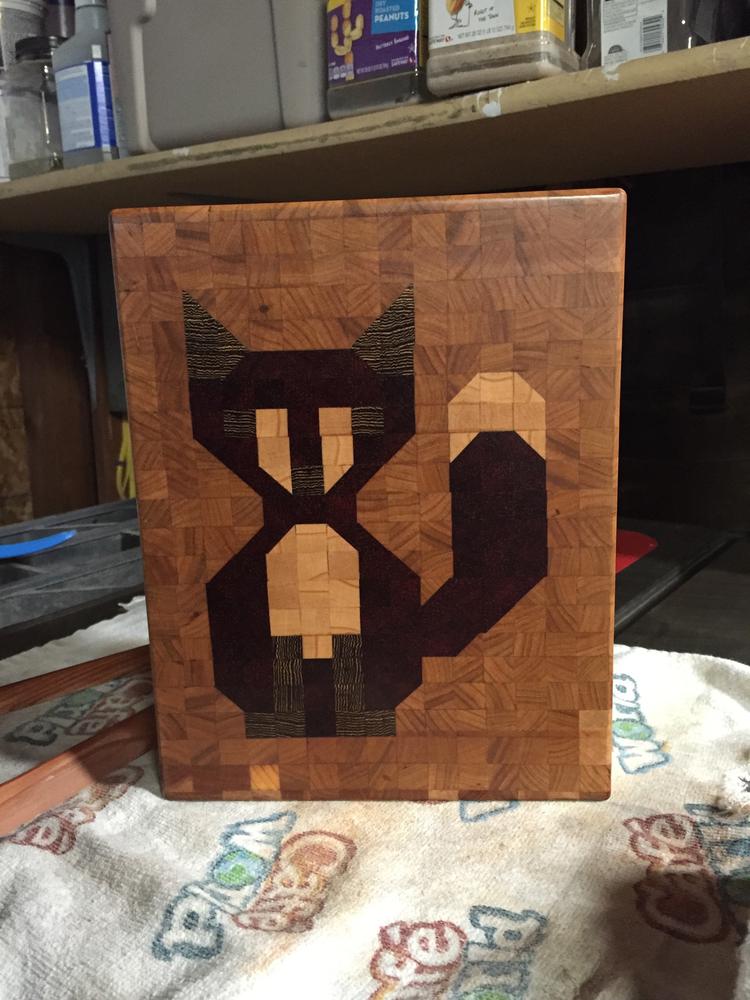
Any rate, I’m pretty happy with how it turned out. The corners didn’t line up quite like I wanted them to, but
it’s my first cutting board, and I built it in a difficult method, so I’m not too surprised. Can’t wait to see
what kind of cutting board I’ll make next!